Add a place or project
Last updated:
A place is somewhere physical people can visit, work or live: a farm, a community or a property. A project is something people work on together that isn't tied to one place, like a seed library or a community currency.
Add a place
- Log in, open your profile and choose Add a place (or Add your place on the Places page).
- Fill in the name, what kind of place it is (farm, community or property), its vision in one line and a few lines about it.
- Type the location, for example "Bellingen, NSW".
- Pick up to 3 things the place is looking for: volunteers, workers and employees, contractors, co-founders, renters, or buyers and investors.
- Add a photo at the top of the form if you have one (optional). It's saved with the rest.
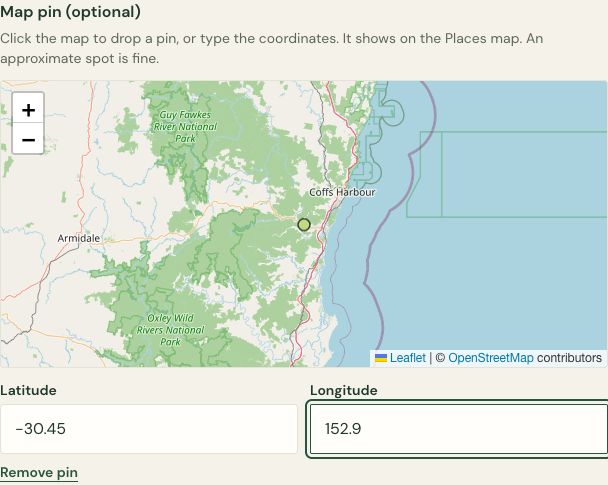
- Put a pin on the map (see below). It's optional, but places without a pin don't show on the map or in "within X km" searches.
- Choose Create place.
Put a pin on the map
- If you see a Find on map box, type a town or address and choose Find. The pin drops there.
- Or click the map to drop the pin yourself. Click again to move it.
- Or type the latitude and longitude if you know them.
- An approximate spot is fine. You don't have to show your front gate. A pin on the nearest town or road works.
- Changed your mind? Choose Remove pin.
Add a photo
You can add a photo while you create the place or project, or later on its Edit page. It's checked automatically, just like profile photos (see Your profile).
Start a project
It's the same, by choosing Start a project on your profile. A project's location is optional and it has no map pin.
Share the running of it
On the place or project's Edit page, under Owners and editors:
- Editors can change the page. Owners can also add and remove people.
- To add someone, type their email, choose Editor or Owner, and choose Add person. If they already have an account, they're added straight away. If not, we email them an invite link (and show it to you, so you can text it too). The link works once, for 14 days, so send it only to the person you invited.
- Hand over: tick this to give the page to its real owner. Once they accept, they become an owner and you're taken off. Handy if you've set up a page for a neighbour.
- Changed your mind about an invite that hasn't been accepted? Choose Cancel invite.
You need to have confirmed your email before you can invite people. Once our email is fully switched on, you'll also need a confirmed email to add a new place or project, and so will anyone accepting an invite.
Changes to this page
· v1.2
Added the last updated date and change history
· v1.1
Explained how to add photos when creating a page and how to share invite links
· v1.0
First version